
This blog post is about installing and configuring Active Directory Federated Services (ADFS) for Office 365 in a hybrid migration scenario.
What is ADFS? What does it accomplish?
With ADFS, we can provide "single sign-on" (SSO) functionality for Office 365 users.
This allows users to access Office 365 resources without having to authenticate a second time after authenticating with local Active Directory at logon.
Here is the difference...
Without ADFS, I logon to the domain in the office and my desktop displays.
If Exchange is implemented onsite, I can simply open Outlook without needing to enter my credentials again. This is because Outlook is using Windows authentication. Outlook is aware that I have logged on to the client machine (in fact, the domain) successfully and does not prompt me again for a username and password.
If we use Exchange Online (with Office 365), Outlook must access my hosted mailbox. However, Azure Active Directory (the Active Directory database for Office 365) has no means of knowing (by default) that I have just authenticated successfully to the domain. Therefore, it will prompt me for my credentials.
Now, if we implement DirSync, my username and my password (in fact, the hash of my password) will be synced to Azure Active Directory and I can use the very same username / password combination to access my mailbox hosted on Office 365.
Some call this "same sign-on": I use the same credentials but... I must authenticate twice.
So "same sign-on" and "single sign-on" are not the same.
Is this a major problem?
Some say "no".
We simply have to enter our credentials a second time. If we open and close Outlook often, in the course of the workday, we can have Outlook remember our password.
Some might argue that the convenience of single sign-on does not justify the complexity of federated authentication.
If this is the position of management, it is indeed possible to use Office 365 without federated authentication (without ADFS). In my last migration (staged migration from Exchange 2007), I simply used DirSync to copy user credentials from my domain to what is now called "Azure Active Directory", the Active Directory database for Office 365 as I mentioned earlier.
On the other hand, if seamless authentication is the priority, we can implement ADFS as I will demonstrate in the following sections.
Summary of steps necessary to implement ADFS
- We need to build a server for the ADFS role (and add it to the domain).
- We need to import a SSL certificate on the ADFS server.
- We must install and configure ADFS itself.
- We must configure Office 365 for federated authentication.
Comments on the ADFS server(s)
I have built a server for the ADFS role (and joined it to the domain). I am using Windows Server 2012 R2 for the operating system but Windows 2008 R2 and Windows 2012 are also possible options. I will not detail this part and assume that anyone who intends to implement ADFS can at least install a Windows Server operating system.
In my test environment, I will use a single ADFS server. In production, we would need a second ADFS server. Why? Because in a hybrid environment with ADFS, clients seeking to access mailboxes migrated to Office 365 will use ADFS to authenticate with the onsite domain controllers. If the sole ADFS server is unavailable, authentication will fail. In other words, users will not be able to access Office 365 - at all - while that single ADFS server is unavailable.
This is completely different from non-federated authentication where user credentials (names and passwords - or password hashes in fact) are synced to Azure AD. In this case, users could access their Office 365 email (from home) even if all the company domain controllers were inaccessible for whatever reason. Of course, users could not even logon at work if the domain controllers were unavailable.
So it is best practice to have two ADFS servers and use a load balancer to redirect all authentication traffic to the active ADFS server if one of the two becomes unavailable.
But even this is not a complete solution.
Users onsite will use the ADFS servers to access Office 365. Remote users would normally not have access to internal servers. So how would users at home or on the road authenticate?
We could allow access to these two servers from the outside, by adjusting firewall rules. Many organizations would consider this a security risk however.
We could have users connect to the internal network with a VPN connection and then use the onsite ADFS servers for authentication. Some organizations would consider this too cumbersome, especially if they are used to methods such as Outlook Anywhere which avoid the need for VPN connections.
The recommended solution is to place two ADFS proxy servers in the DMZ (or possibly hosted in Microsoft Azure).
However, I will not address this aspect here although I may explore it later, once I've become more familiar with federated authentication in general. For the time being, I want to work with the most simple, yet realistic, environment possible. This simplification may be an advantage for readers that are attempting their first ADFS setup as well.
Note: the ADFS Proxy role has even been eliminated with Windows Server 2012 R2. It has been replaced by WAP (Windows Application Proxy).
On this subject, I will note that some organizations simply do not allow access to their internal network without a VPN connection - and even two-factor authentication. In this case, the requirement to connect to the internal network already exists and would not be an additional inconvenience. Consequently, the ADFS proxy servers would not be necessary.
Certificates
ADFS uses four certificates:
- A certificate for communications between clients (users) and ADFS servers
- A "service communications" certificate to secure traffic between federation servers (our ADFS servers and the Office 365 ADFS servers, for example).
- A "token-decrypting" certificate
- A "token-signing" certificate
The last two certificates will be created automatically when ADFS is installed. These certificates will be "self-signed" which is acceptable for those tasks (token signing and decryption). On the other hand, the certificates for communications between ADFS servers and ADFS servers and clients must be obtained from a third party certificate authority (CA) like Verisign, Digicert or Comodo. Fortunately, a single certificate (the same certificate) can be used for these two roles. In other words, we only need to request one certificate from the CA.
Recent changes in ADFS have complicated this process. Previously, ADFS required IIS (web server role) and we could use IIS to create a certificate request to be submitted to the certificate authority. Windows Server 2012 R2 (used here) introduces ADFS 3.0 which no longer uses IIS and we can no longer use IIS to create a certificate request.
There are several possible solutions. In my opinion, the most simple is to create the request on a server with IIS, submit the request, download the certificate, install it on the server used to create the request, export the certificate from that server and then import it on the ADFS server(s).
Now I'll present this process step-by-step.
Note: as usual, my screenshots concentrate on what is essential and may not include the "Next" or "Finish" button at the bottom of the window. If the reader wants to follow this procedure in their own environment, I will assume they understand they need to click "Next" to move to the next screen and can, for that matter, do so without me constantly repeating "Then click Next".
On the server where IIS is installed, open IIS, select the server in the left pane and "Create Certificate Request" in the right (Action) pane:

Please follow the prompts. In the window "Distinguished Name Properties", enter the information indicated below and do include your organizational unit even though it is blank below (I had to go back and add it). I simply put "IT".

As for the certificate's "common name", it is common to use either "sts" or "adfs" followed by the public domain name of the organization. For example:
- sts.contoso.com
- adfs.fabrikam.com
Do not use the name of the ADFS server itself. I will not elaborate but this can create problems with what is known as "SPN". Moreover, if you have several ADFS servers, using the name of one of them for all of them would not make sense.
On the following screen, we can keep the defaults and continue (Next...):

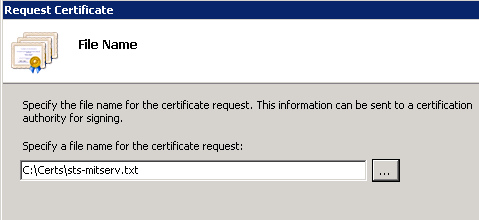
At the end, we create the certificate request file (a simple text file in fact):
Next, we submit the certificate request to the certificate authority. The exact process varies from vendor to vendor. In some cases, we copy the content of the text file (not the file itself), paste it into a text box on the vendor's website, and then click "Submit". We then receive an email asking us to validate the request by clicking on a link. Once validation is complete, we can download the certificate, often included in a zip file with one or more intermediate certificates.
My best advice is to follow the instructions provided by the vendor and consult technical support as needed.
In a previous blog post, I provided some directions about the procedure with the vendor "Certificates for Exchange".
Installing a third-party certificate on Exchange (2007 - SP3)
At this point, I will make the assumption that you have obtained a certificate signed by the certificate authority of your choice and have downloaded it to the server on which you created the request file. In some cases, this involves extracting the certificate from a compressed file, often a .zip file, that sometimes includes additional certificates called intermediate certificates. These certificates (if they are provided) must be installed as well.
In my case, there are two intermediate certificates. However, since I only really need them installed on the ADFS server, I will demonstrate that later. For the time being, I will install and then export the requested certificate on the server with IIS so it can be imported on the ADFS server.
Note: I will only summarize the steps that follow, without necessarily inserting a screenshot for each action.
First, we return to the IIS management console where we created the certificate request but now we click on "Complete Certificate Request" in the Actions pane. Follow the prompts. Essentially, you will be asked to navigate to the location where you downloaded the certificate and then install it:

As soon as the certificate is installed, we will export it. As shown below, click on the certificate itself and then select "Export" in the Actions pane:

Enter a path and password for the certificate export:

Now we are almost ready to import the (exported) certificate to the ADFS server.
First, we may (or may not) have to import an "intermediate certificate". I prefer to explain this process somewhat quickly because details may differ between vendors, assuming once again you have to import such a certificate at all.
In my case, the intermediate certificates were included in the .zip file downloaded from the vendor's website. I extracted these certificates to a folder on the IIS server, installed and then exported them. Next, I copied them to a folder on the ADFS server. In the screenshots below, I open the Certificates MMC (for the "Local Computer" - not "User") and navigate to that folder (yes, on the ADFS server).
Note: such a MMC does not exist by default in Administration Tools; you have to open a fresh MMC (enter mmc in "Run") and add the Certificates snap-in, for the Local Computer once again.
So once we have opened the MMC, navigate to the location indicated below and select "Import". Then follow the prompts to import the intermediate certificate.

I'll only post the most important screenshots below (click "Next", "OK", and "Finish" as needed.

Yes, in the screenshot above, that is the intermediate certificate to import.

The location above is where the intermediate certificate(s) should be imported.
Now, we can finally import the certificate requested and acquired from the third party authority. We do this in the same MMC as above but this time we will import the certificate into the "Personal" folder of the Local Computer certificate store:

As we did for the intermediate certificates, we browse to the location where we placed the requested certificate and we import it:

Note: the exported file copied to the ADFS server will have the .pfx extension.
We must enter the same password to import the certificate as we did when we exported it from the IIS server:

Note: optionally we can mark the key as exportable. If not, the certificate will function all the same.
We complete the operation as shown in the steps below...


We can see the imported certificate in the "Personal" folder of the Local Computer certificate store:

***
Now that we have imported the SSL certificate, we are ready to install the ADFS role. That will be the subject of the next blog post.
Thank you for reading the article about Office 365 - Hybrid Migration - Part 1: ADFS configuration (overview, certificates) on the blog NEW TECH If you want to disseminate this article on please list the link as the source, and if this article was helpful please bookmark this page in your web browser by pressing Ctrl + D on your keyboard keys.